Using the Before and After attributes within your workflows can enhance your workflows tremendously and give you the ability to single out specific events to execute on. These attribute allow you to pinpoint exactly when a change takes place and lets you react to that change. This blog is aimed teaching you how to find these attributes and will provide tips on how you can utilize them.
The first thing to do is find these attributes. Generally speaking, the before and after for these events will be nested under “changes.attributes” within the event json. For example, the before and after for adding a tag will look like this:
'changes': {
'attributes': {
'updatedAt': {
'op': 'replace',
'before': '2022-12-16T19:24:53.108Z',
'after': '2022-12-16T22:50:59.270Z'
},
'modifiedAt': {
'op': 'add',
'after': '2022-12-16T22:50:59.270Z'
},
'tags': {
'op': 'replace',
'before': [],
'after': [
'639cf6533632e06947e18db8'
]
},
'rev': {
'op': 'replace',
'before': 4,
'after': 5
}
},
'relationships': {
'modifiedBy': {
'op': 'add',
'after': {
'links': {
'self': '/v1/users/639cc00c4e6e023d73a76424'
},
'data': {
'type': 'user',
'id': '639cc00c4e6e023d73a76424'
}
}
}
}
}
Where you can see the “tags” attribute is nested under “changes.attributes”. There, you’ll find the “before” and the “after” attributes which tell you that the tag “639cf6533632e06947e18db8” was added to the tags array.
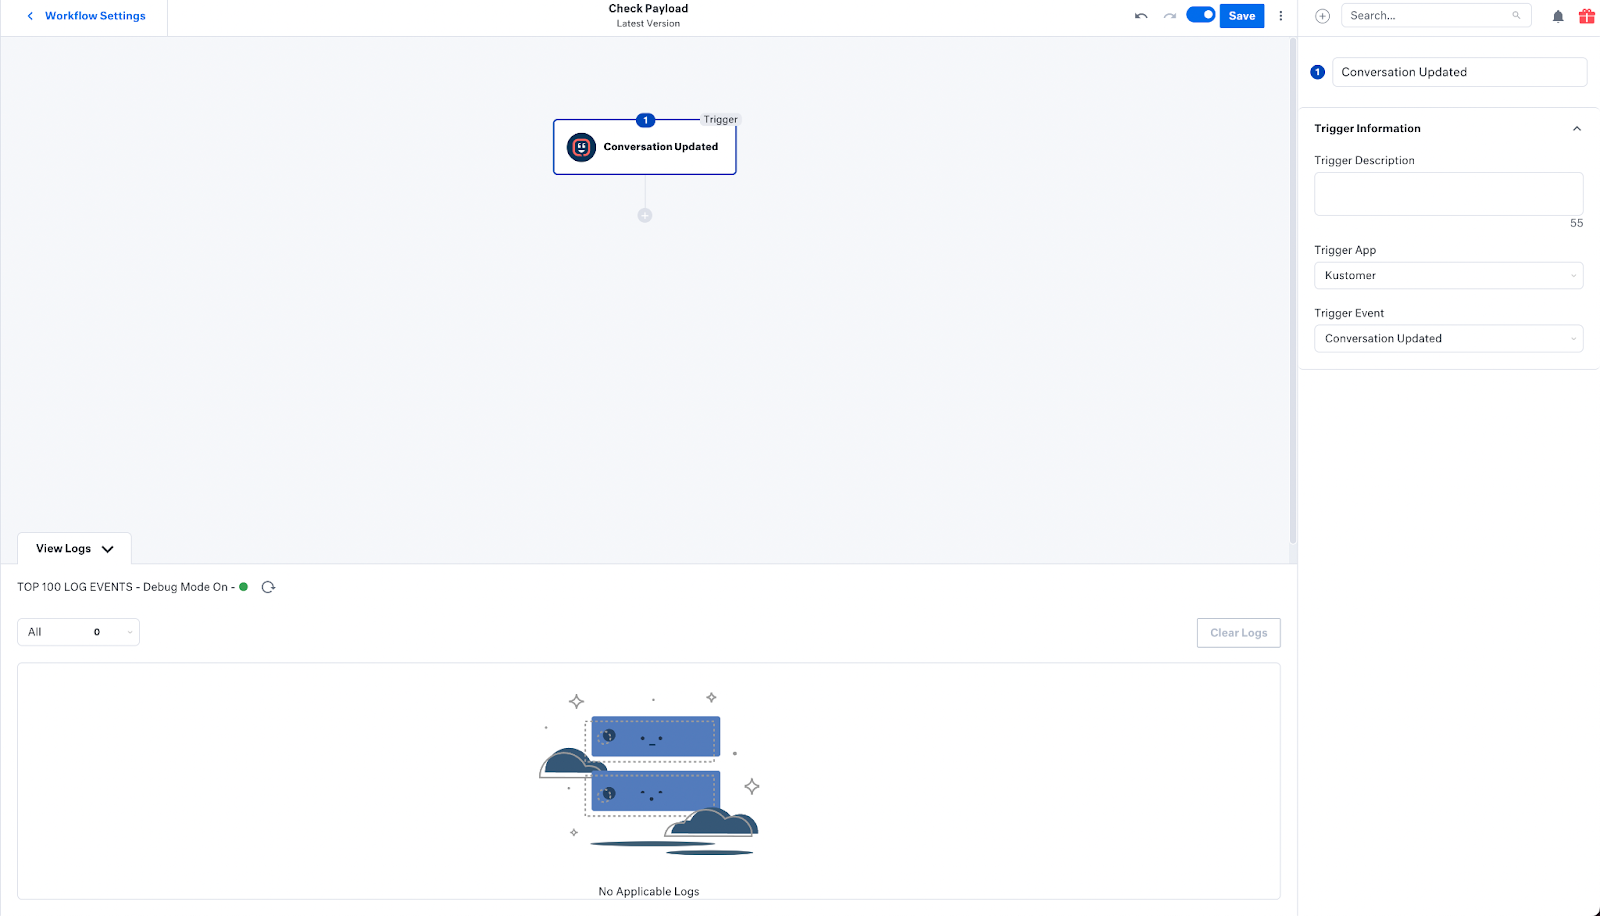
The easiest way to find any before and after attribute is to create a very simple workflow. This workflow would be modified for whichever object you’re looking for - for this example we will use the conversation object.
All the workflow needs is to trigger off of the “Conversation Update” action, and to have logs turned on.
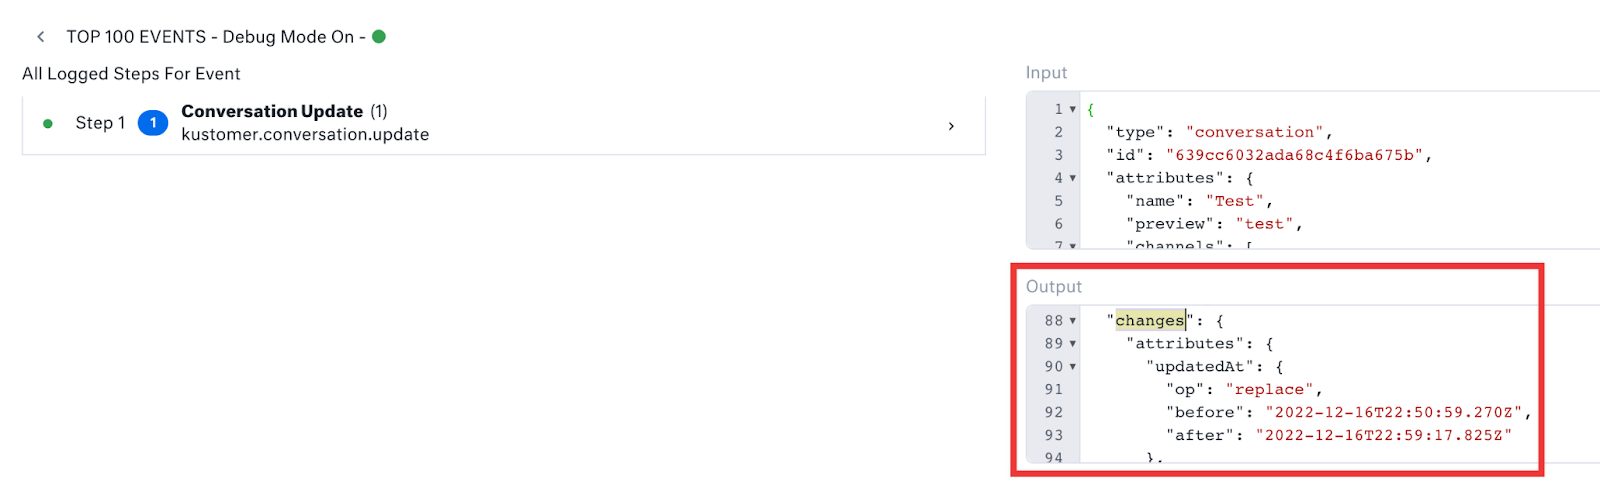
Now, whenever you update a conversation, you will be able to track the specific event where the update takes place and find the before and after attributes by looking at the output logs.
Note: I would recommend copying and pasting the output log into a code editor of your choice so that you can more easily read it.
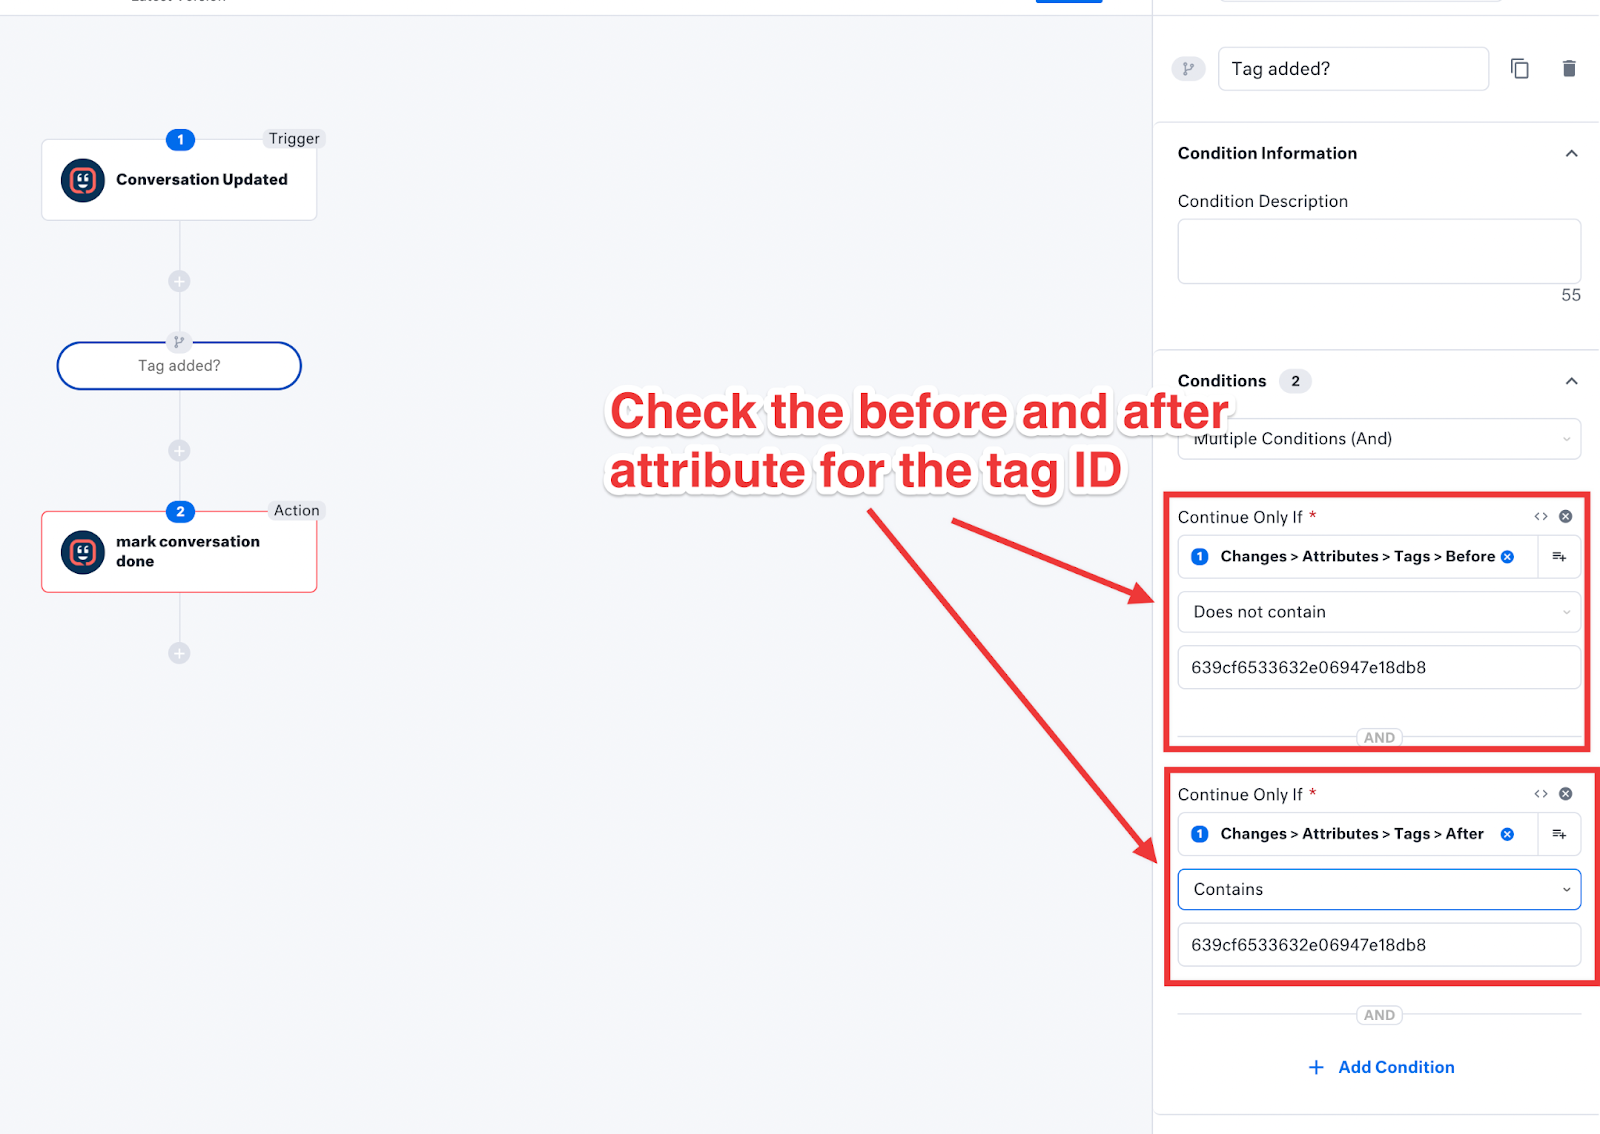
Now that we can find these before and after attributes, I’ll show an example for how you can use them. If we go back to the tags example, let’s say I wanted to mark a conversation done whenever a certain tag is applied. To avoid infinitely repeating workflows or marking a conversation done at the incorrect time, we would use before and after to pinpoint the correct event.
The workflow would now look like this:
This will now automatically mark conversations done only when the specific tag is applied.
Utilizing the before and after attributes in events is a great way to pinpoint exact timings to perform actions. These tips and examples will give you a headstart in creating your own advanced workflows and I encourage you to experiment from here.